Marching Band Synthesizer Carts
23 Dec 2016
For my Eagle Scout Project, I led a team of people to design and build synthesizer carts for use in my high school’s performance ensembles. Below are notes on the project for those who might want to build their own versions.
Introduction
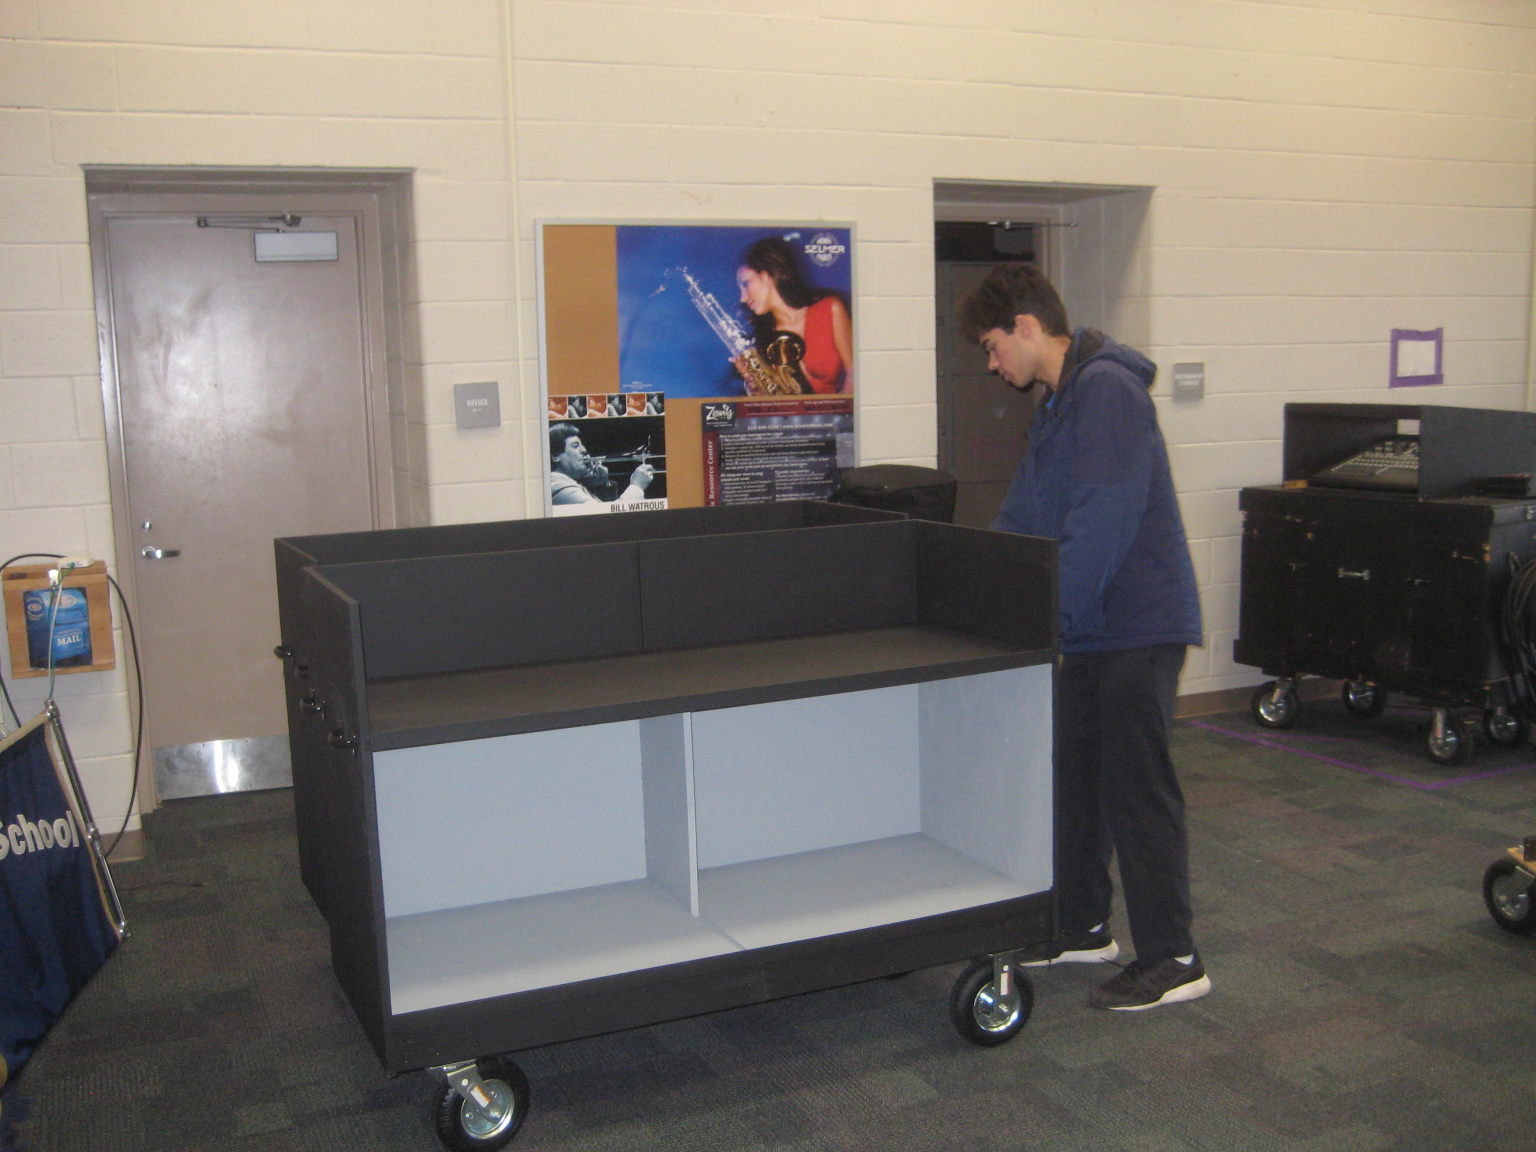
What follows is a procedure for building wooden synthesizer carts for use in indoor and outdoor performance ensembles. The final products are painted carts with large pneumatic tires for outdoor use. The carts are overall 5’ long (holding almost all synthesizers), 2’ deep (fitting through standard doorways), and elevate the keyboard to a height of 36” (generally the proper playing height). The carts are sturdy enough to protect the synthesizers during transit and also function for the storage and transport of other items.
Professionally-made metal carts for synthesizers can cost around $1,000 per cart. In contrast, this procedure costs about $325 per cart. This project uses common materials (2x4s, plywood, dry wall screws, etc) which can be obtained at most local hardware stores. Expect some savings when building multiple carts, as materials can often be reused.
Basic woodworking experience is required, as well as some shop tools. With the help of more experienced woodworkers, the project is relatively easy for even novices to manage. Three to four people are recommended to work on this project, though much of the work can be done with only two people. Depending on your experience level, this project should require about 85 hours of labor to build two carts.
I have provided plans for making the carts out of either 3/4” or 1/2” plywood. You may choose whichever lumber thickness you think is appropriate. Also note that all dimensions can easily be adjusted for shorter keyboards, smaller players, etc.
This procedure is based on the work of my Eagle Scout project, completed in November of 2016.
Tools
- track saw or circular saw
- table saw or router (only necessary if you are completing the 3/4" cart design, see below)
- power drill
- paint brushes and other painting supplies
- sockets (for the lag screws)
- torque wrench
- tape measure
- pencil
- safety goggles
Materials and Cost
You may choose to build your carts out of either 3/4” or 1/2” plywood. The plans for both carts are very similar, except that the 1/2” cart does not have dado grooves that allow the pieces to interlock. The 3/4” cart will appear more sturdy, and if you have the tools it is not difficult. However, I would recommend the 1/2” cart for most people, since it does not require the use of a table saw or router, saves time, and is still quite rigid.
- 3 8' lengths of 2x4s premium grade
- 3 sheets of 3/4" or 1/2" plywood (depending on design chosen)
- 2 8' lengths of 1 1/2" square molding
- coarse thread #9x3" screws (for attaching the 2x4s of the base)
- coarse thread 1 5/8"x8 screws (if building 3/4" cart)
- coarse thread #6x1" screws (if building 1/2" cart)
- 4d 1 3/8" nails
- wood glue
- 4 black handles
- small screws for attaching the handles (with a length less than the thickness of plywood you choose)
- 2 swivel 8" pneumatic casters
- 2 fixed 8" pneumatic casters
- 16 1" lag screws
- 16 washers (to fit the lag screws
- flat black paint
- flat gray paint
The most difficult items to obtain are the wheels. I recommend Harbor Freight, which has swivel and fixed wheels at reasonable prices (about $15 a wheel). Other stores charge significantly more (anywhere from $40 to $150 a wheel).
When I completed this project for my Eagle Scout project, I spent about $650 to build two carts. You should expect each cart to cost around $325.
Design: 3/4" Plywood Version
The overall dimensions for both versions are 60”x24”x46”, excluding the handles.
These drawings do not include all of the pieces, but provide a good overview of the construction of the cart.
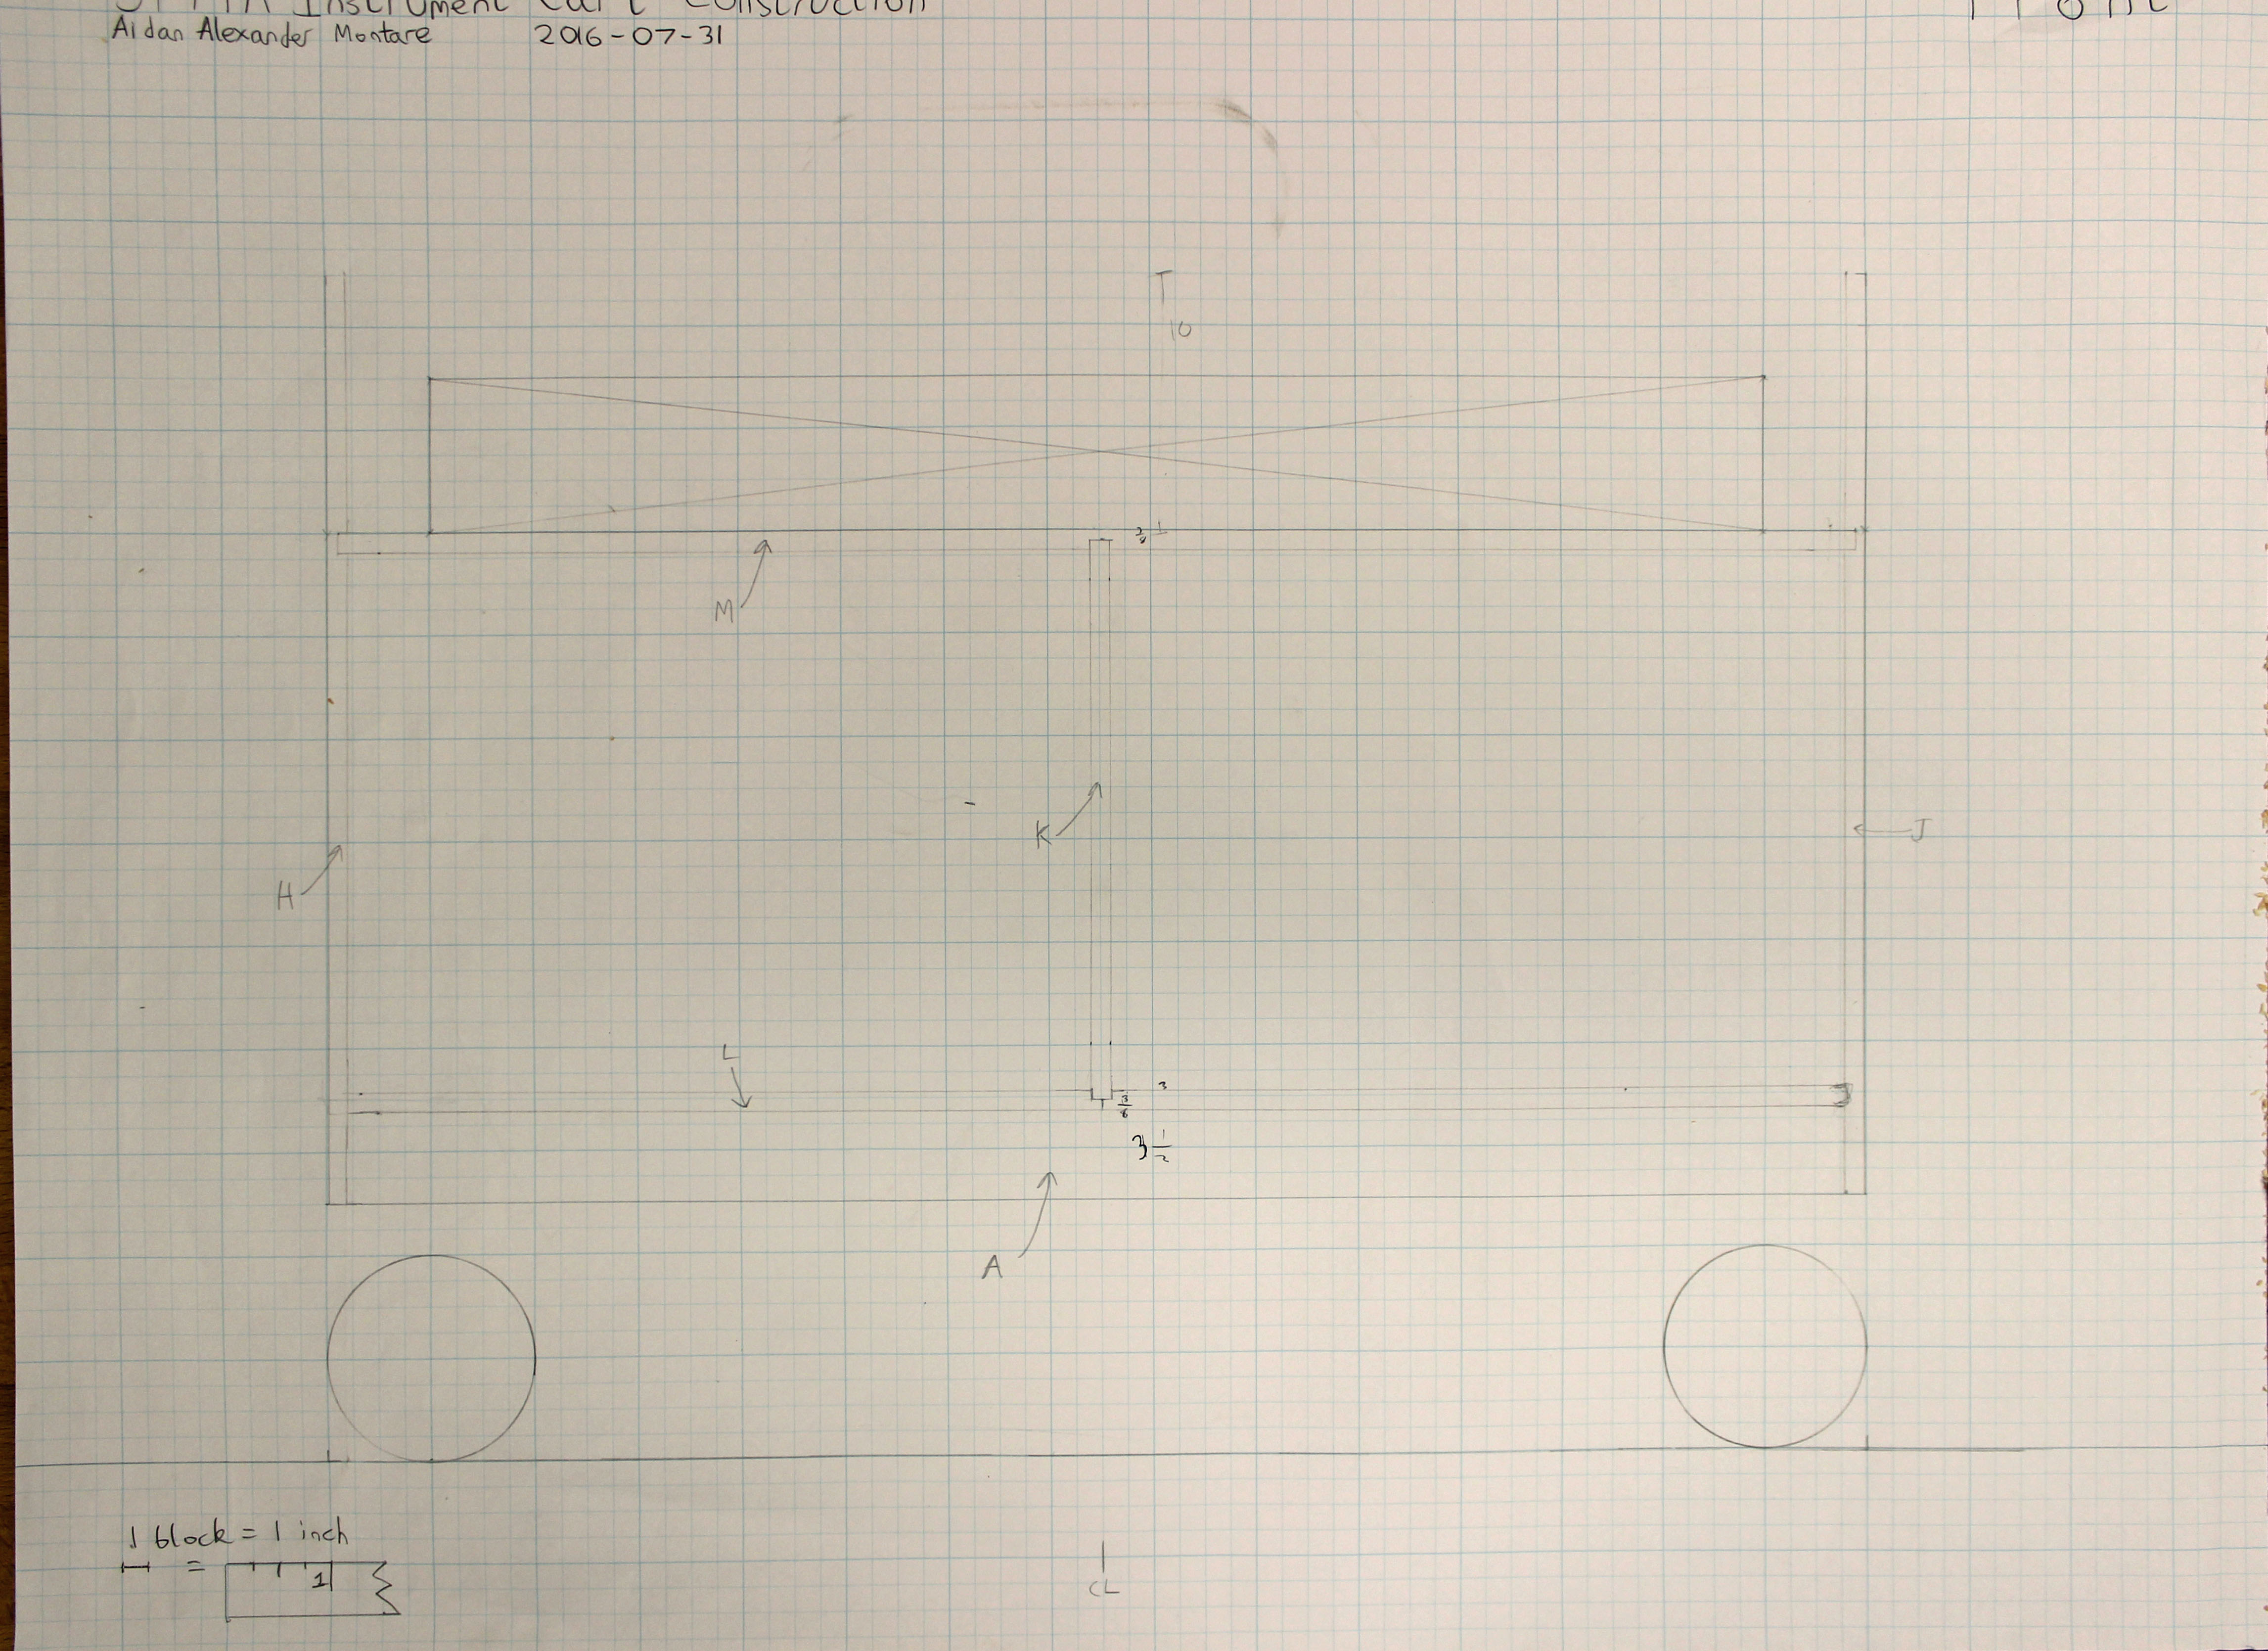
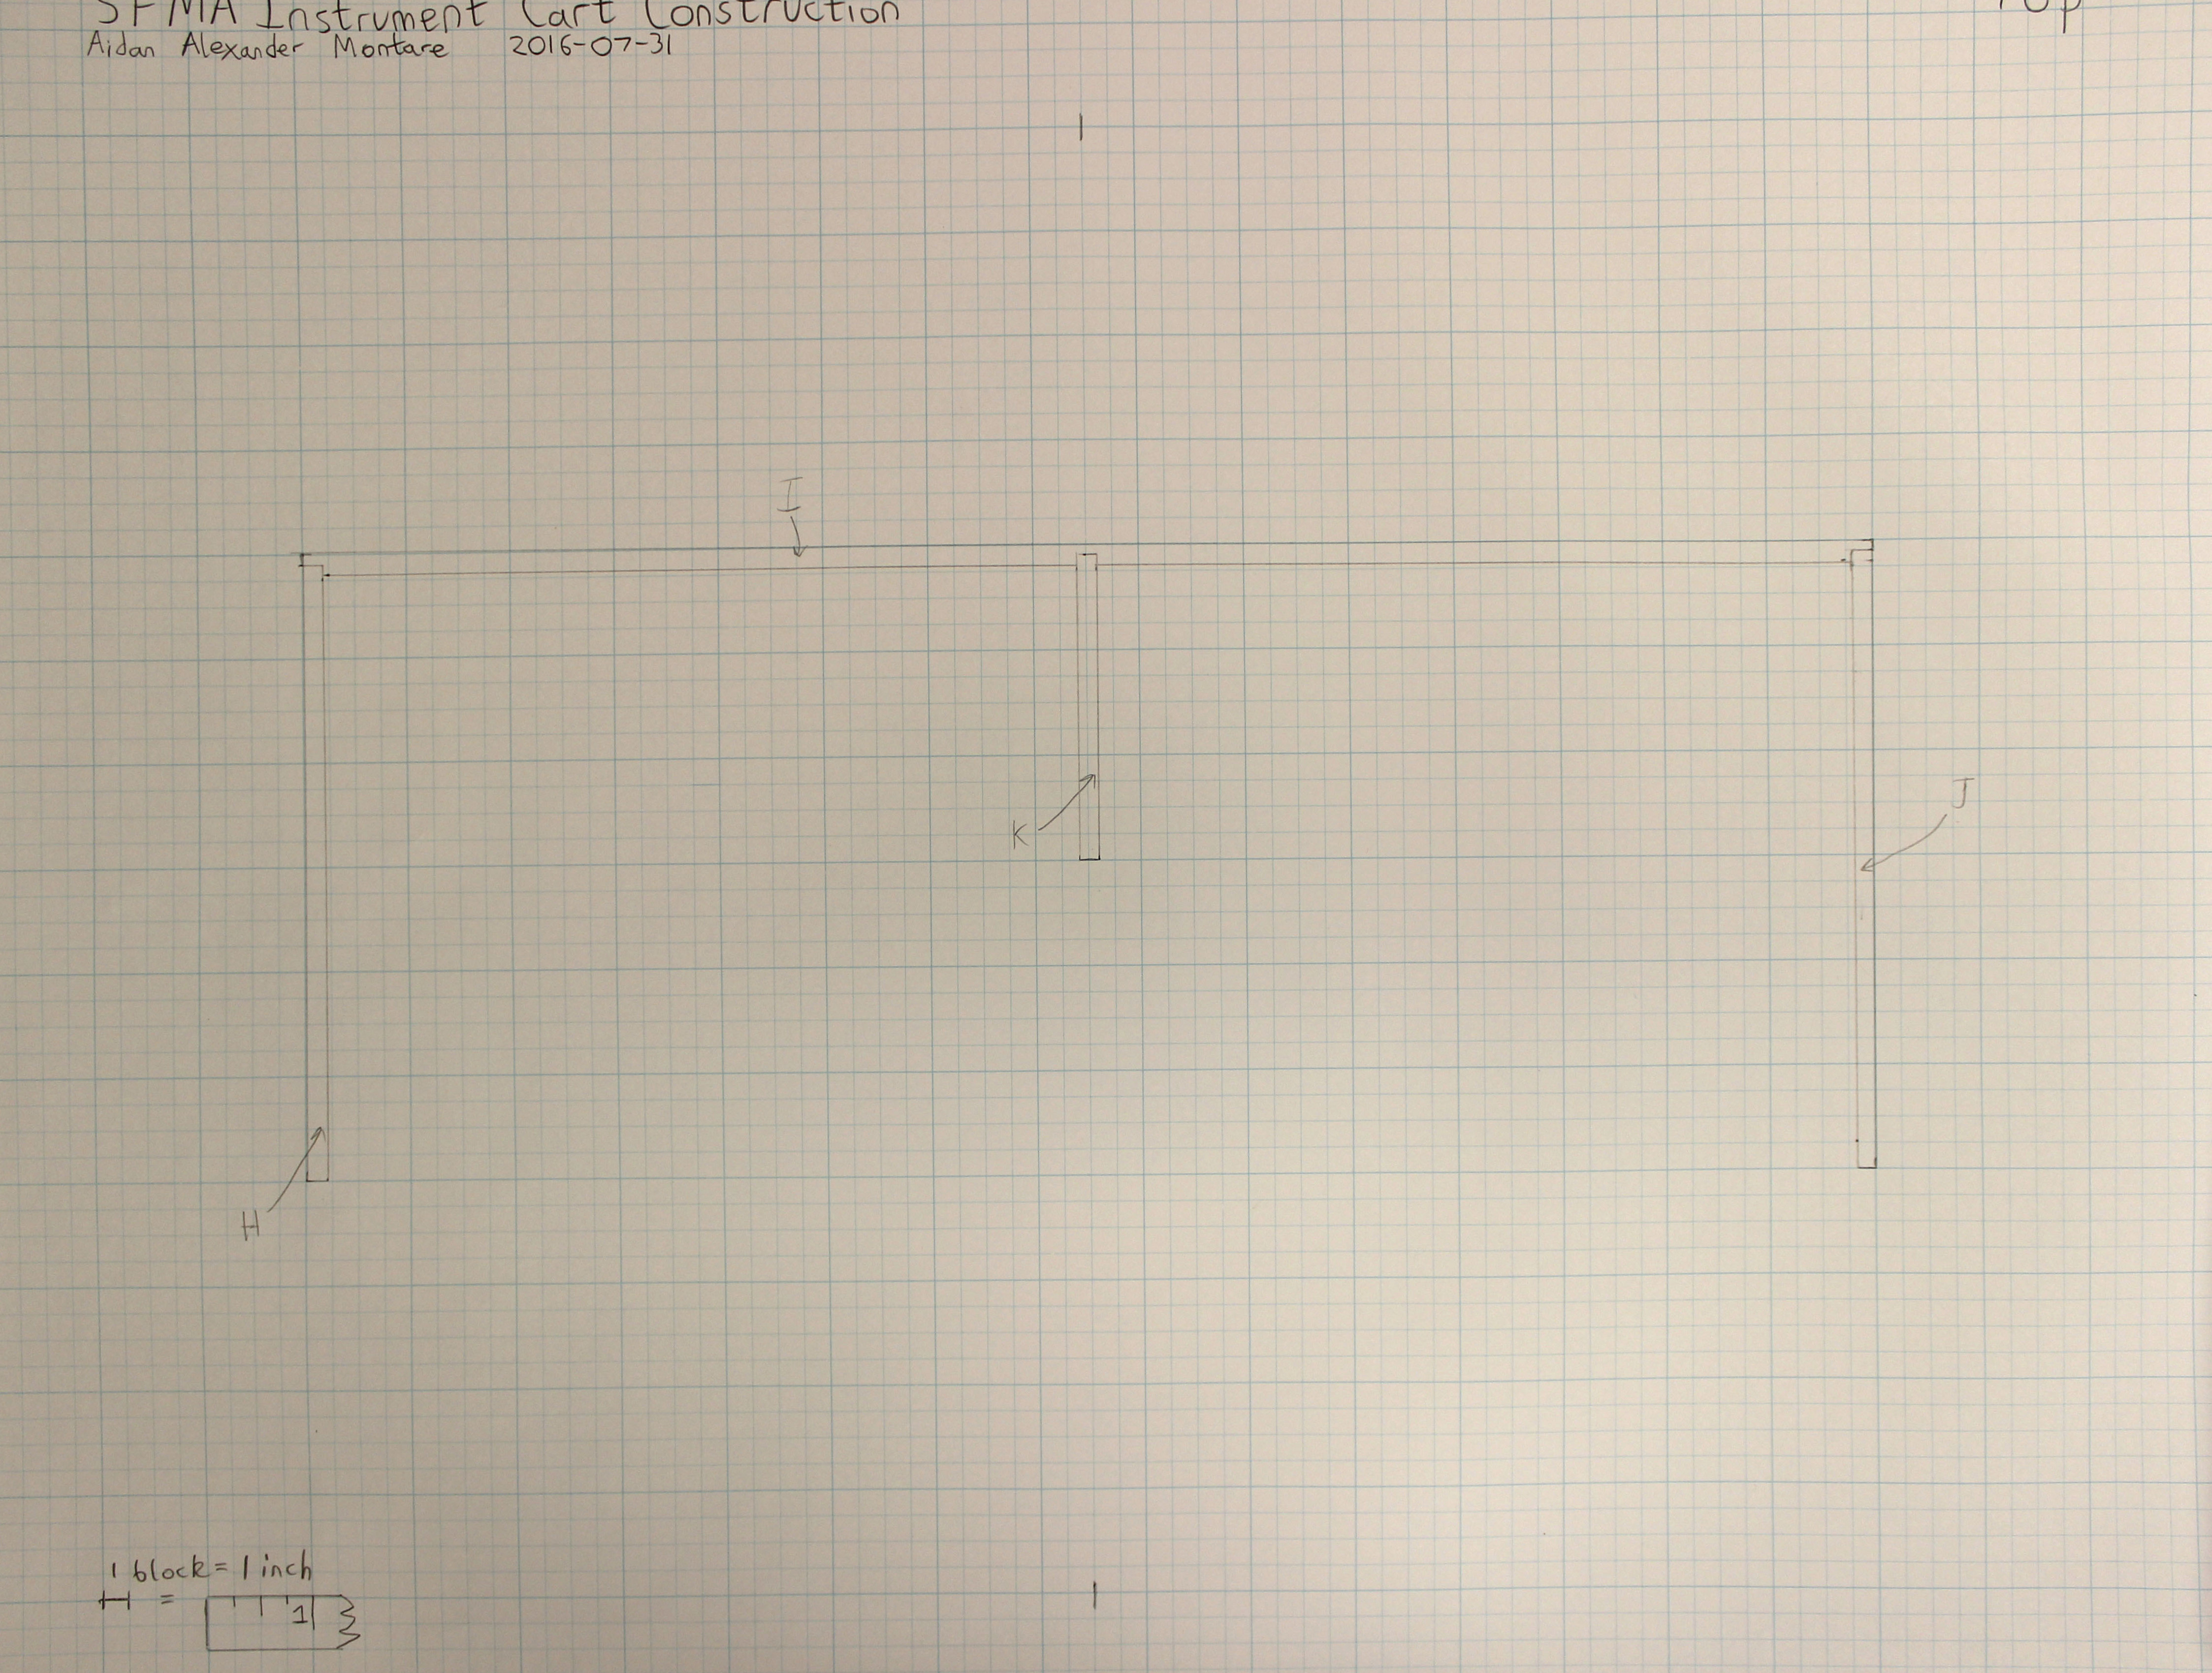
You may choose to not make dado cuts along the left and right edges of the back (part I). Remember that this will adjust the dimensions slightly.
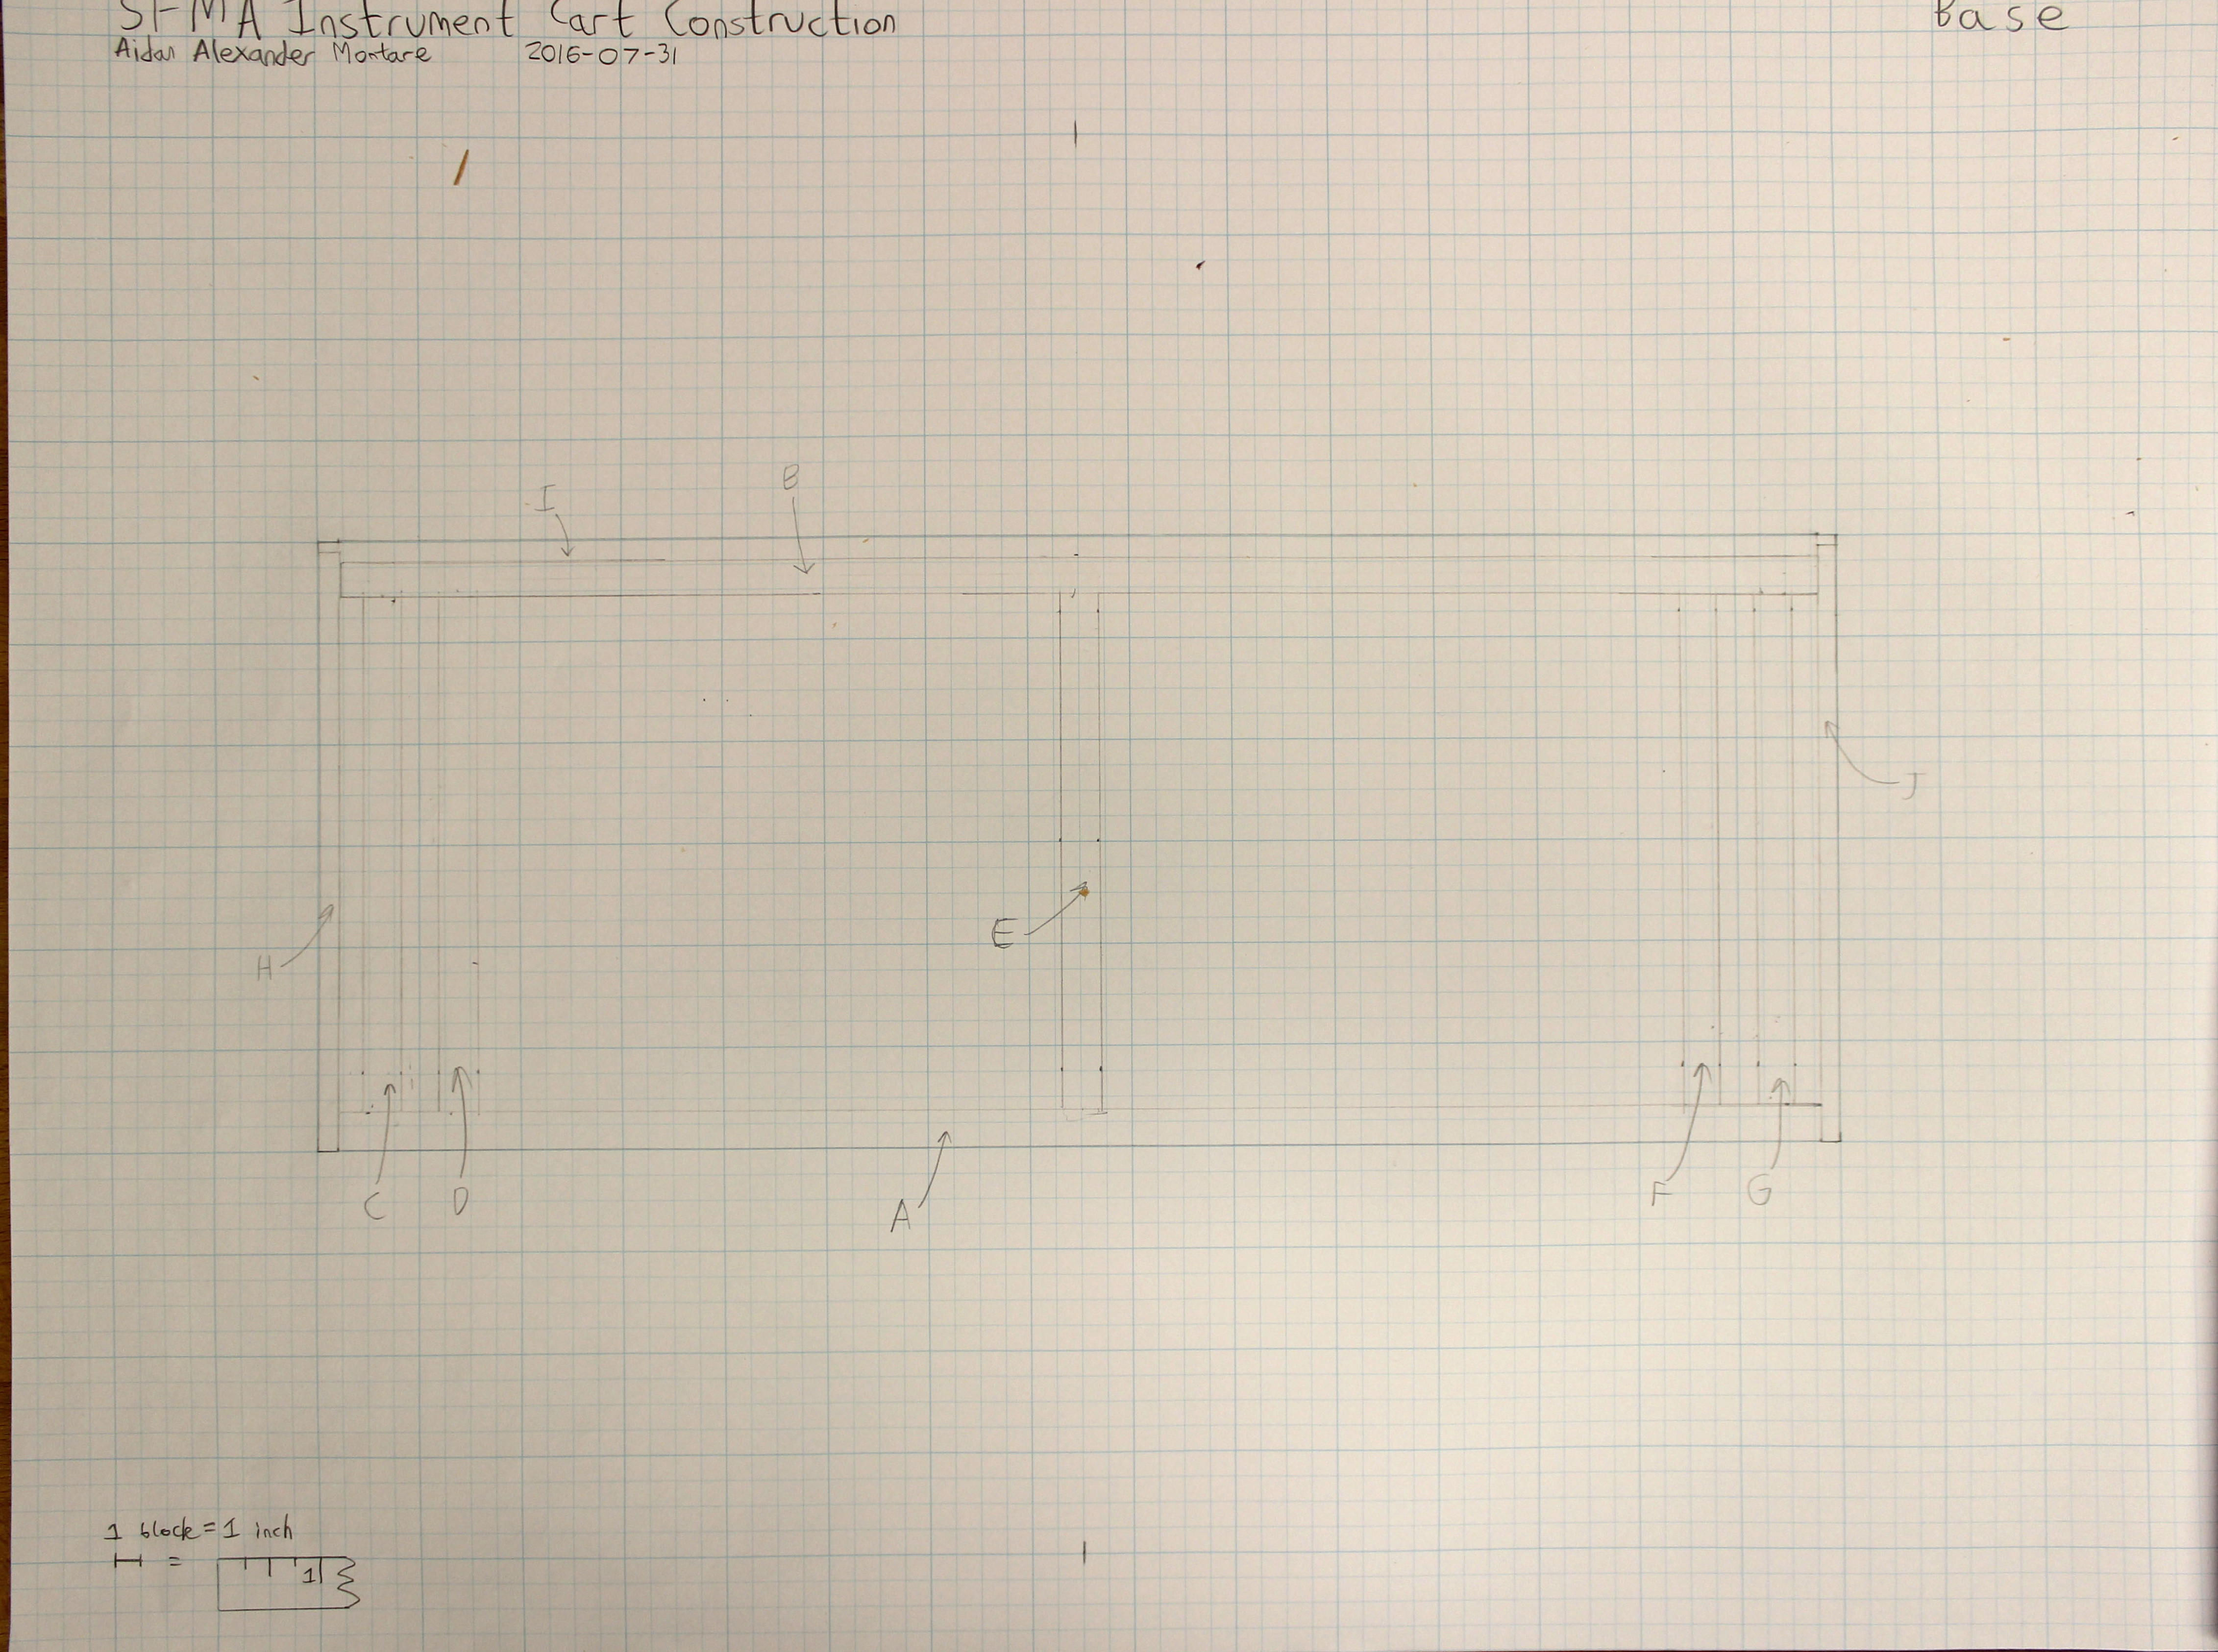
Absent from this drawing are the extra 2x4s (parts N and O) that were added along the edge of the base to give more area for the side walls to screw into. The spacing of the 2x4s that are shown was not used in the final construction; see the Building section for details.
Cutting Plans
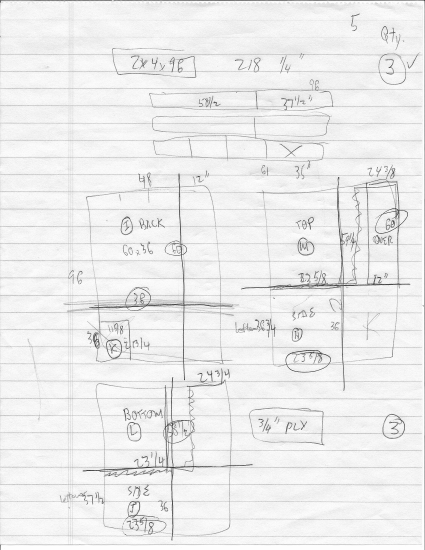
Listed is each part’s identifying letter, its overall dimensions, and a diagram of additional cuts that must be made (if necessary).
2x4s
| A | 58 1/2” |
| B | 58 1/2” |
| C | 20 1/4” |
| D | 20 1/4” |
| E | 20 1/4” |
| F | 20 1/4” |
| G | 20 1/4” |
| N | 20 1/4” |
| O | 20 1/4” |
3/4" plywood pieces
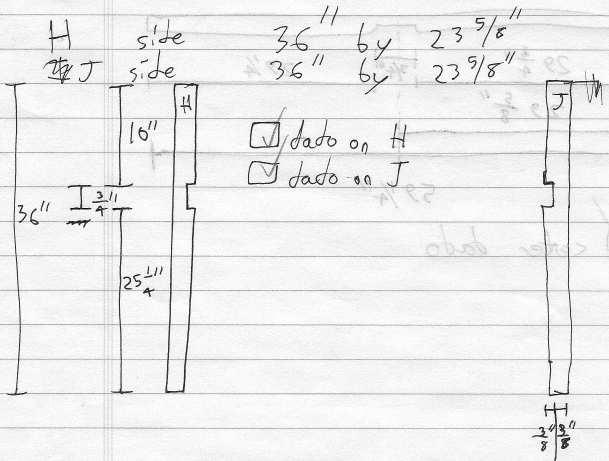
| H (player’s left side wall) | 36” x 23 5/8” |
| J (player’s right side wall) | 36” x 23 5/8” |
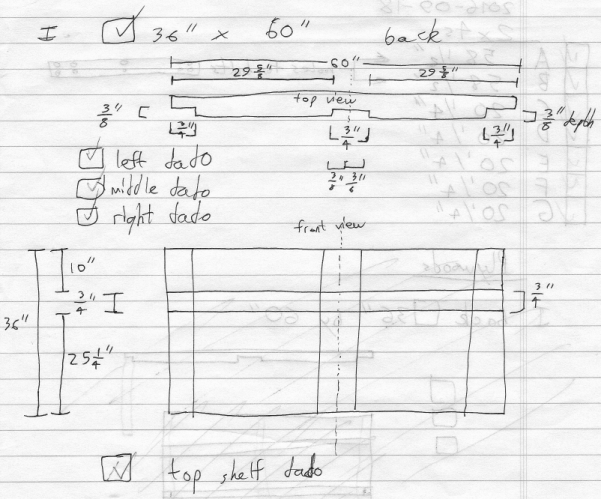
| I (back) | 36” x 60” |
| K (vertical support) | 21 3/4” x 11 5/8” |
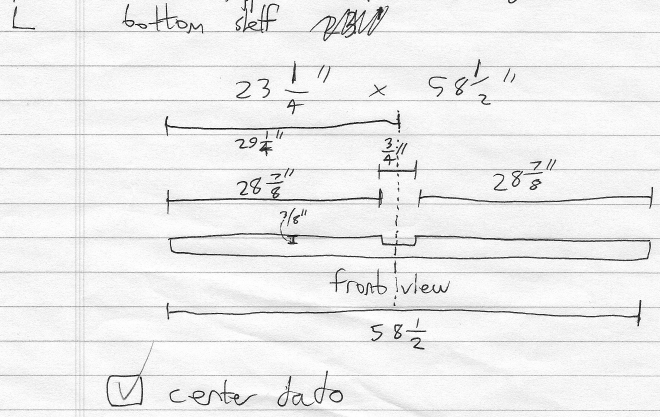
| L (bottom shelf) | 23 1/4” x 58 1/2” |
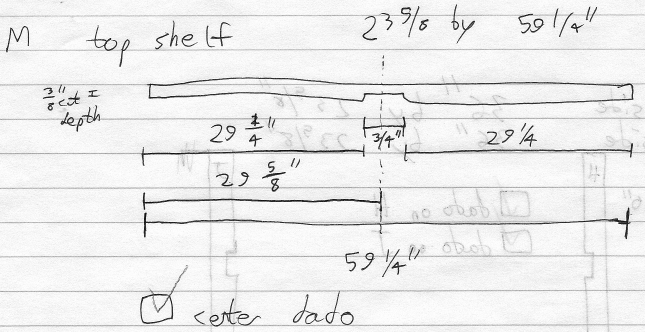
| M (top shelf) | 23 5/8” x 59 1/4” |
1 1/2" square molding
- on front edge of L (bottom shelf): 60”
- on front edge of M (top shelf): 60”
Design: 1/2" Plywood Version
The 1/2” plywood cart is nearly identical to the 3/4” cart, except that the plywood pieces are not interlocking (1/2” plywood is generally too thin for dado cuts). The overall dimensions stay the same, but the dimensions of the pieces change slightly to account for the thinner plywood and the lack of dados.
Cutting Plans
2x4s
| A | 59” |
| B | 59” |
| C | 20 1/2” |
| D | 20 1/2” |
| E | 20 1/2” |
| F | 20 1/2” |
| G | 20 1/2” |
| N | 20 1/2” |
| O | 20 1/2” |
1/2" plywood pieces
| H (player’s left side wall) | 36” x 23 1/2” |
| I (back) | 36” x 60” |
| J (player’s right side wall) | 36” x 23 1/2” |
| K (vertical support) | 21 1/2” x 11 1/2” |
| L (bottom shelf) | 23 1/2” x 59” |
| M (top shelf) | 23 1/2” x 59” |
1 1/2" square molding
- on front edge of L (bottom shelf): 60”
- on front edge of M (top shelf): 60”
Building
You must first cut all the pieces. If you have a table saw, cut the like dimensions together (i.e. H, I, and J are all 36” tall) to ensure they are the exact same sizes.
Though there are other ways, this is how I cut the pieces out of the raw materials:
Assemble the base first. Glue and screw all joints using 3 drywall screws and wood glue. I found it was easiest to attach all the cross pieces to the long piece, and then attach the second long piece.
Space pieces C, D, F, and G like so:
Not shown in this picture are 2x4s N and O, which are at the very end.
You should stagger the screws on the inner two 2x4s on each end (the ones the wheels will be attached to) so that they are not in the center of the board. This is so that lag screws (which hold on the wheels) do not hit the screws inside the wood. If you use three screws on each 2x4 joint in the base, you can stagger the bottom two (bottom meaning they are on the side the wheels will go on) and place the top one in the middle of the wood.
The completed base looks like this:
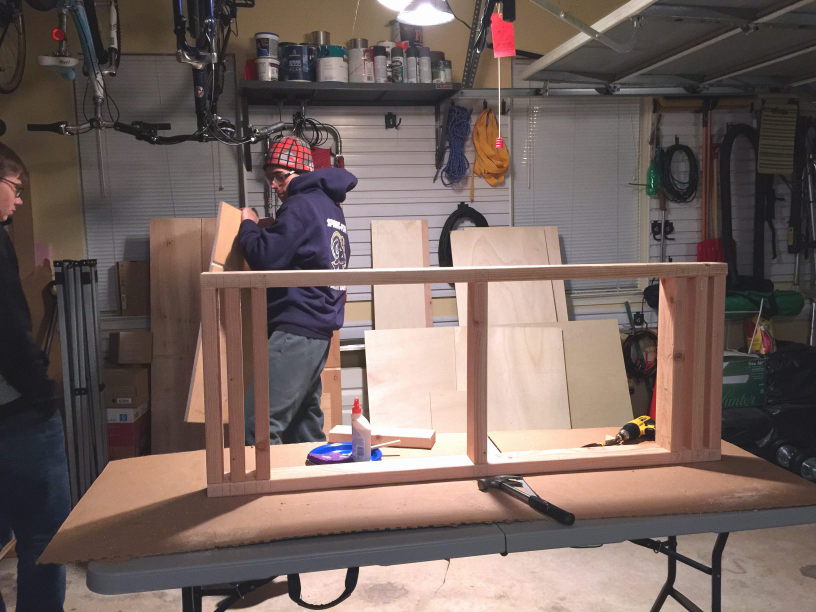
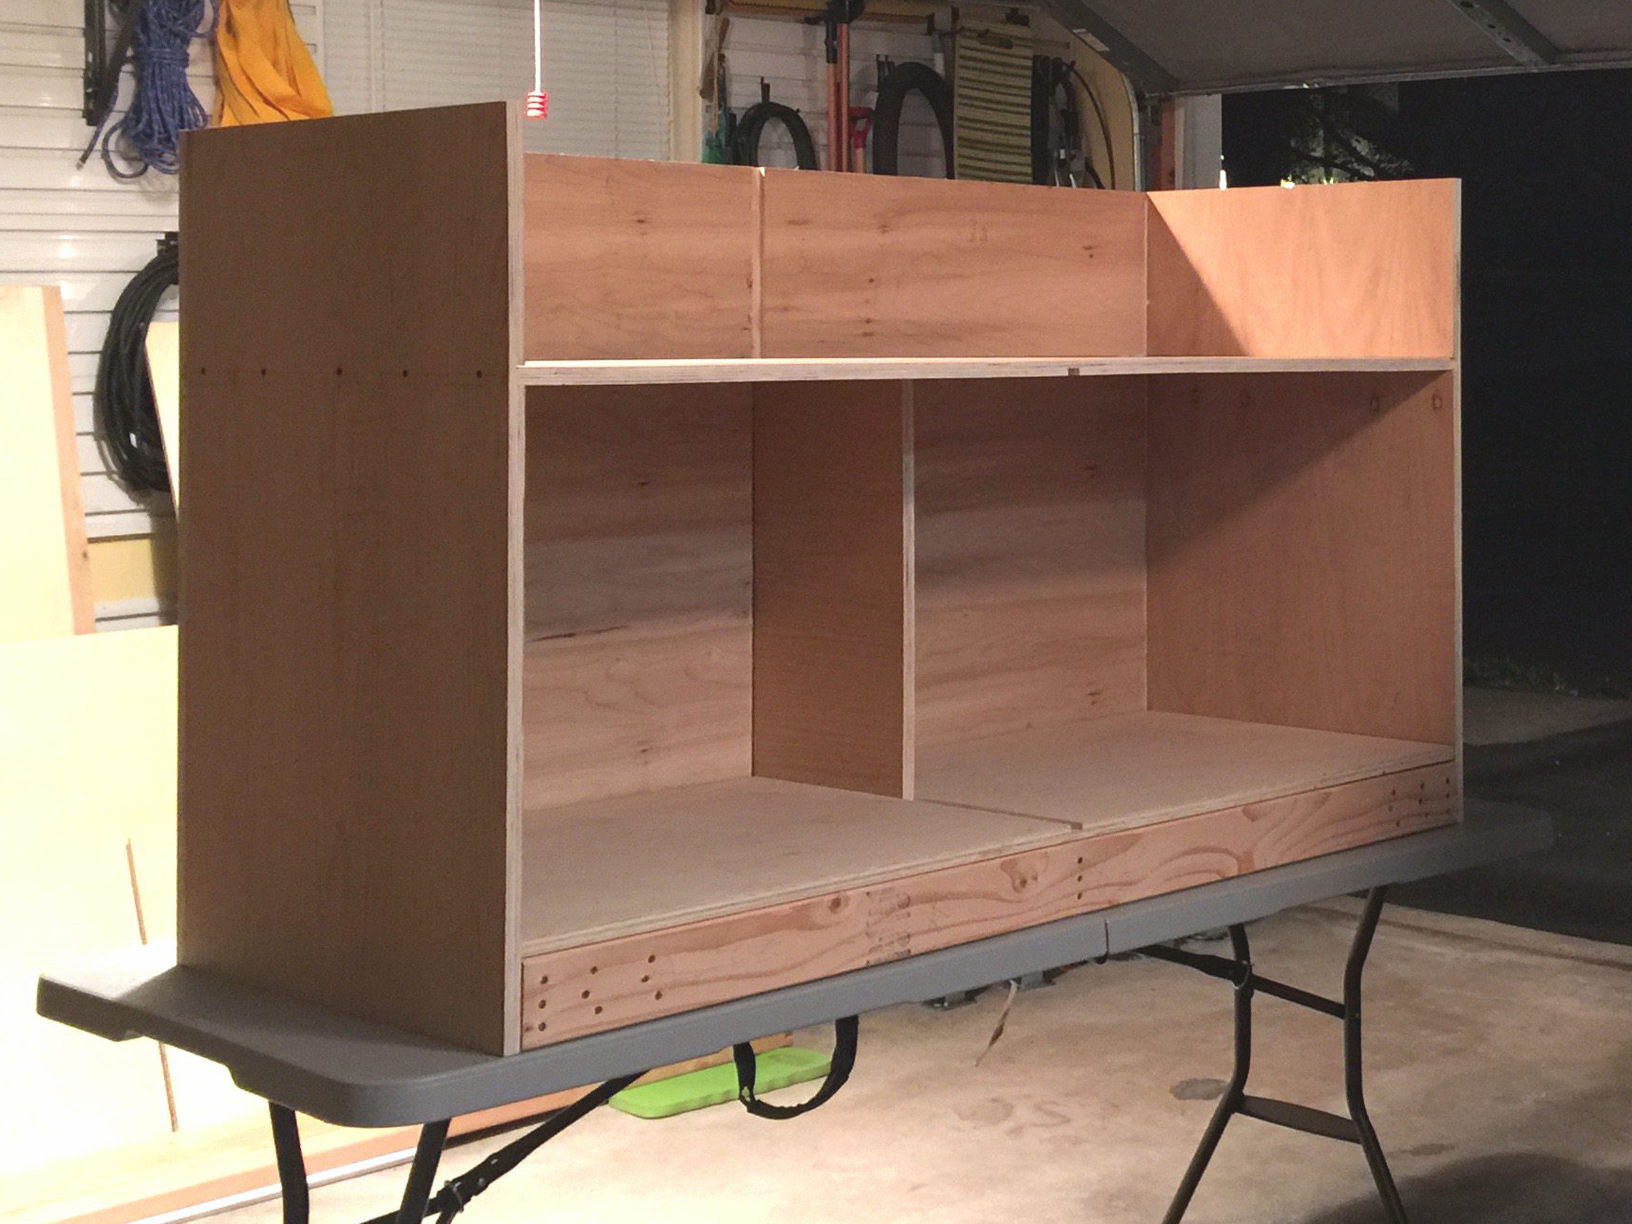
Next, assemble the body. Start by joining H and J (the sides) to M (the top shelf). This will make a big H-shaped thing to which you can then attach the back wall (I).
Take the assembled base and apply glue to the edges where it will meet with H, I, and J. Slide the base underneath those pieces (as shown in the picture below). Slide in the bottom shelf (L), and attach the shelf down into the base with a few screws. Then screw H, I, and J to the bottom shelf.
Slide the vertical support (K) into place, and attach with screws through the top shelf and the back wall.
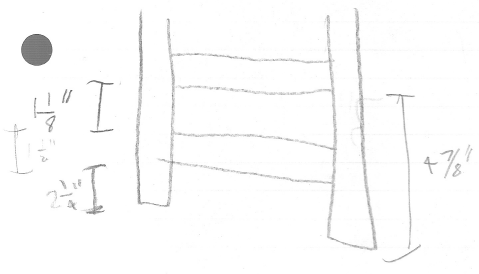
Cut and attach strips of the 1 1/2” molding to provide a lip for each shelf (preventing items from falling off). Glue and nail these to the shelves.
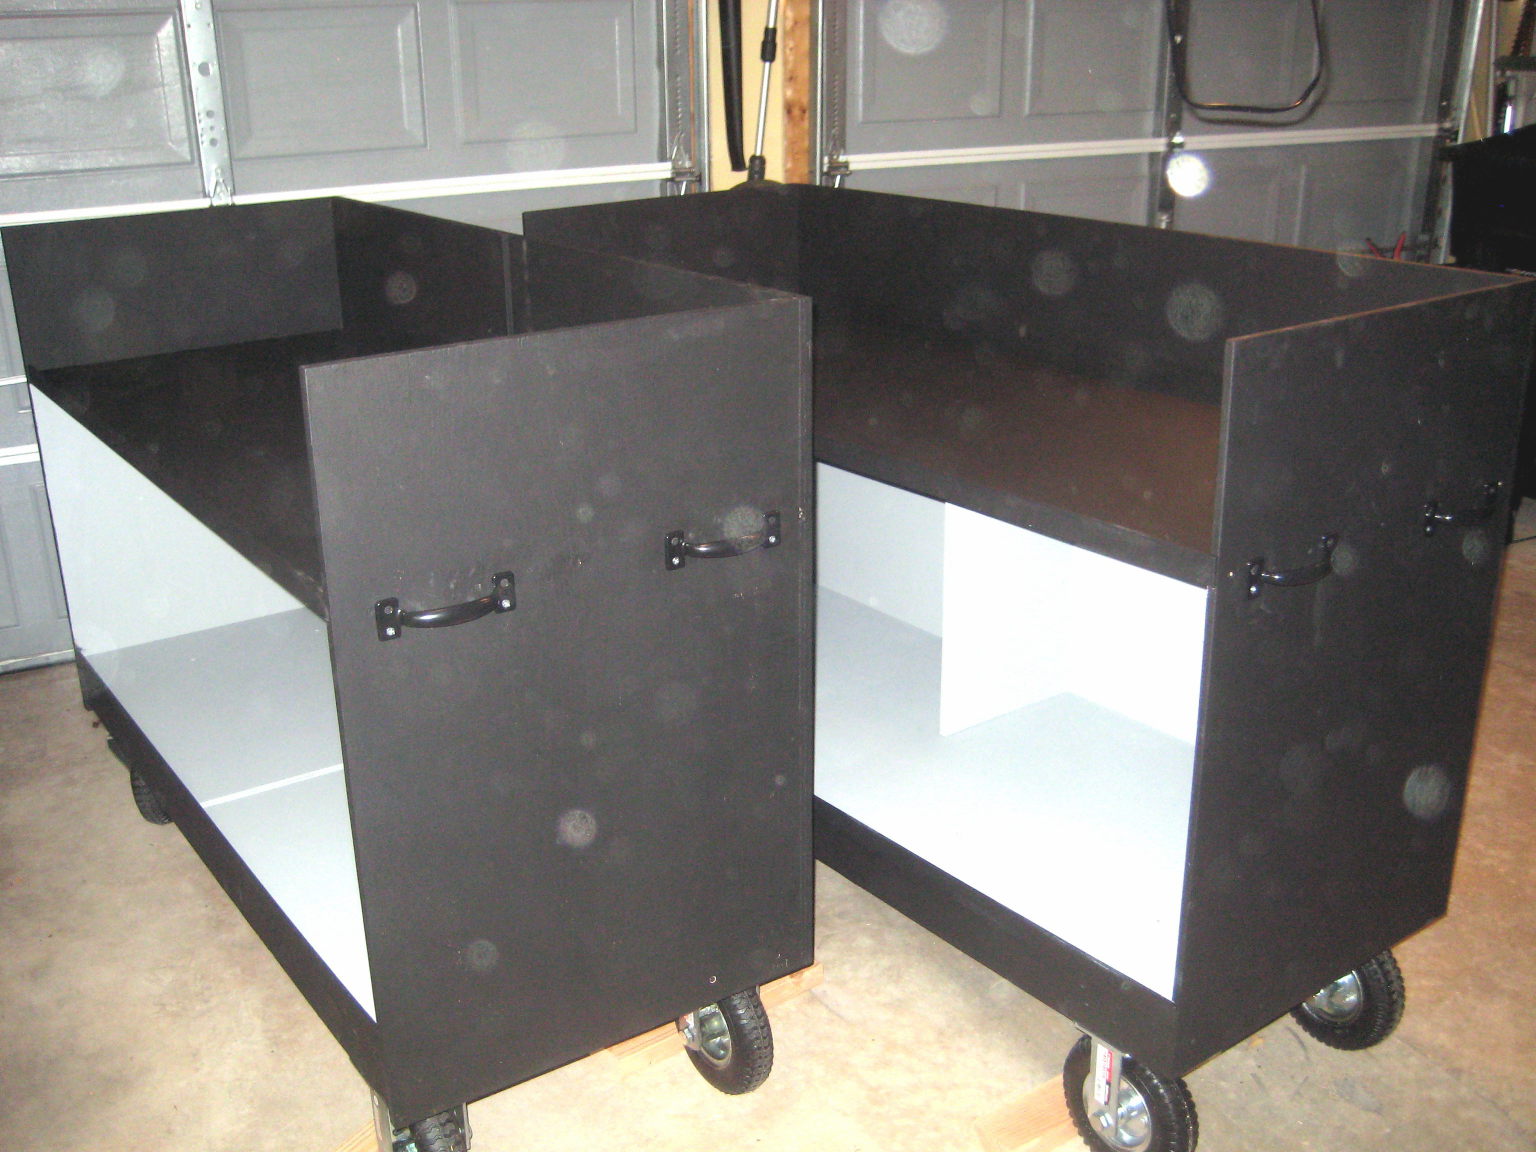
The wood is now assembled!
Paint the carts before attaching the wheels. Use the gray paint to paint the inside of the storage area (making items easier to find, especially at night). Paint the rest of the cart black. I recommend two coats. Whether you want to paint the bottoms of the carts or not is up to you (I did).
After the paint is dry, the wheels are attached to the inner two 2x4s on each end using the lag screws. You may want to inflate the wheels before attaching them. Definitely make sure that the air connectors on the wheels face the outside of the cart.
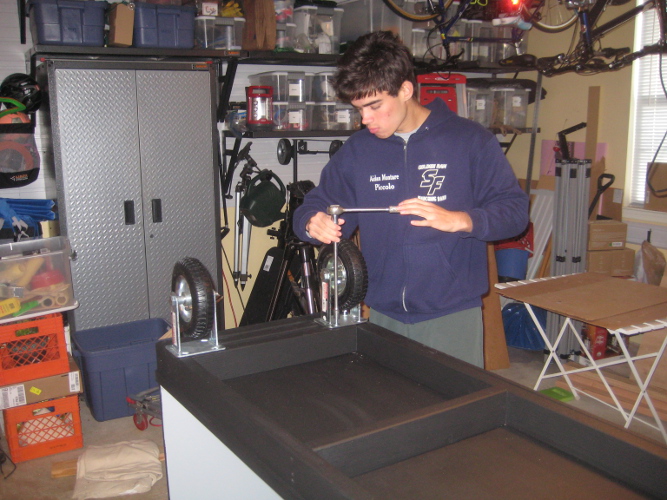
Finally, attach 2 handles to each side. Align the handles such that at least some of the handle’s screws go through the top shelf (rather than just the thin sides). You may have to use shorter screws for the other holes so that the end of the screw is not exposed inside the cart.
Usage and Maintenance
Absent from these plans are holes for the passage of cables. It is recommended that holes be drilled based on the needs and preferences of the ensemble that will be using the equipment.
The tires will need to be periodically refilled. If a pit member complains the carts are difficult to push, this may be the reason. It is suggested that organizations make checking tire pressure a part of their calendar so that this does not become a issue.
Possible Enhancements
Molding
Cut strips of 1/8”-thick molding to cover the exposed edges of the plywood to prevent fraying in the elements. Nail in with finishing nails.
Transparent Cover
My original concept for these carts included a transparent lid (made out of something like plexiglass or acrylic) that would protect the synthesizers from the rain. When I completed this project for my Eagle Scout project, I removed the covers to cut costs.